Monday, December 26, 2022

Pinchos (Puerto Rican Grilled Pork Skewers)


PREP TIME
10 mins 

COOK TIME 10 mins

MARINATING TIME 1 day

TOTAL TIME 1 d 20 mins


EQUIPMENT

12" or 14" skewers

outdoor grill


INGREDIENTS


3 1/2 pounds pork tenderloin or boneless, skinless chicken thighs, cut into 1 1/2" - 2" chunks


Pinchos Marinade

1 cup white wine vinegar

3/4 cup sofrito

1/2 cup extra virgin olive oil

2 tablespoons sazon seasoning

1 tablespoon granulated garlic

1 tablespoon onion powder

2 teaspoons adobo seasoning

1 1/2 teaspoons dried oregano

3/4 teaspoons black pepper


Spicy Pinchos Sauce

1/4 cup, packed light brown sugar

2 teaspoons adobo seasoning

1 1/2 teaspoons granulated garlic

1 1/2 teaspoons onion powder

1/2 teaspoon black pepper

2 tablespoons sofrito

1/4 cup hot sauce optional

14 ounce bottle BBQ sauce


To Serve

1 pound loaf pan sobao or soft crust Italian bread, slice 1" thick


INSTRUCTIONS 

Prepare the Marinade and Marinate the Meat

Fill a quart size mason jar with the white wine vinegar, sofrito, olive oil, sazon, granulated garlic, onion powder, adobo, oregano, and black pepper.

Screw the jar's lid on tightly and shake the contents vigorously until well combined.

Pour the marinade over the meat in a large, non-reactive mixing bowl. Toss the meat in the marinade to evenly coat it.

Cover the bowl with plastic wrap and marinate the meat in the refrigerator for 12-24 hours.

Make the Spicy Pinchos Sauce

In a 2 quart saucepan, stir together the brown sugar, adobo, granulated garlic, and onion powder.

Add the sofrito, hot sauce and BBQ sauce to the pot and stir together until smooth.

Bring the sauce mixture up to a boil over med-high heat. Allow the mixture to boil for one minute.

Reduce the heat to low and simmer the sauce for 10 minutes, stirring frequently to discourage sticking.

After 10 minutes, remove the sauce from the heat. It is now ready to be used or stored at room temperature for 2 days in a jar.

Thread the Marinated Meat Onto Skewers

Forty-five minutes prior to grilling the meat, begin soaking your wooden skewers in water. Lay the skewers on a flat platter or sheetpan and cover them with water.

Lay a paper towel over the skewers to keep them submerged in the water.

Remove the meat from the refrigerator and use a colander to drain the marinade from the meat.

Preheat your charcoal grill while the skewers are soaking.

After the skewers have soaked for 30 minutes, thread the meat onto them.

Use your hand to measure 3" from the end of the stick- this will serve as a handle for holding the skewers. Thread the meat tightly packed onto the skewers, leaving that 3" space from the bottom of the skewer.

Leave a 1 1/2" space at the top for adding the bread slice later.

Lay the threaded skewers on a sheet pan while you thread the remaining meat.

Grill the Meat

Once your grill reaches 450°F, lay the pinchos on the oiled grate.

Place your foil-wrapped, sliced bread in the coolest area of the grill, or on the grill's warming shelf.

Grill the pinchos on the first side for 3 minutes.

Carefully- the skewers will be hot- turn the pinchos over to the other side. Brush the grilled side liberally with the Spicy Pinchos Sauce and grill for an additional 3 minutes.

Flip the pinchos onto the sauced side. Brush them with more sauce and grill for 2 minutes.

Flip them over one last time and grill for another 2 minutes, or until the sauce is caramelized and the internal temperature of the pinchos reaches 145°F.

Remove the pinchos and bread from the grill.

Tent a large piece of aluminum foil over the pinchos and allow them to rest for 5 minutes. Stick a slice of bread on the end of each pincho before serving.

Leftover Pincho sauce may be heated to boiling and drizzled over the grilled pinchos as desired.

Enjoy while hot.

NOTES

Store leftover pinchos off of the skewer in the refrigerator for 3 days. 

Freeze the meat after marinating in freezer storage bags for up to 6 months. Thaw under refrigeration for 24 hours prior to grilling.

From: https://senseandedibility.com/ 

Sunday, December 11, 2022

Nashville Hot Chicken

 Ingredients

8-16 pieces chicken tenders or bone-in chicken pieces 8 pieces of bone-in or about 16 tenders

1 tablespoon kosher salt divided among chicken pieces


Chicken Seasoning

1 tablespoon smoked paprika regular paprika works as a substitute

1 tablespoon cayenne pepper

2 teaspoons garlic powder

2 teaspoons freshly ground black pepper

1 teaspoons ground white pepper


Chicken Coating

2 cups all-purpose flour

2 tablespoons cornstarch

1 tablespoon hot sauce I use Louisiana

1 cup whole milk buttermilk can be substituted but it makes the crunch a little softer

2 large egg whites

2 tablespoons vodka don't skip this step!!

about 2 quarts peanut or vegetable oil for deep frying


Nashville Hot Seasoning

1/2 cup hot fry oil

2 tablespoons cayenne pepper

1 tablespoon light brown sugar

1 tablespoon Kosher salt

2 tsp freshly ground black pepper

1.5 teaspoon garlic powder

1 teaspoon paprika

1 teaspoon onion powder

1 teaspoon chili powder


For Serving

sliced white bread

pickle slices


Instructions

Prep the Chicken

Place the chicken pieces on a baking sheet or cutting board and sprinkle all over with 1 tablespoon of kosher salt, dividing among the chicken. Set aside at room temperature for 30 minutes (or refrigerate overnight).

In a large bowl, combine the paprika, white pepper, black pepper, cayenne, and garlic powder. Use 2 tablespoons (about half) of the spice mixture and sprinkle directly onto the chicken pieces, patting it into the chicken as you go.

Chicken Drudging

Add the flour and cornstarch to the remaining spice mixture in the bowl and whisk well to combine. In a separate medium bowl, place the buttermilk, egg whites, hot sauce, and alcohol and whisk thoroughly to combine.

Use one hand for the wet mixture and one hand for the dry, take 1 piece of chicken at a time, toss in the flour mixture, shaking off excess, dip chicken in the buttermilk mixture to completely coat, then place back in the flour mixture. Toss as needed to completely coat the chicken, pressing into it with your fingers. Repeat with remaining chicken.

Set aside at room temperature for at least 10 minutes (up to 30 minutes) while you set up for frying and heat the oil.

Place the oil in a large Dutch oven or deep, heavy-bottom pan, attach a candy or deep-fry thermometer, and heat over medium-high heat until the oil is 360°F, about 15 minutes. Set up your serving plates nearby with pieces of white bread. This is where the cooked chicken will land.

Frying the Chicken

Working in batches, place 3 chicken pieces (or 5 tenders) at a time in the oil and fry, using tongs to rotate the pieces every 3 to 4 minutes and adjusting the heat as needed to keep heat at 325°F, until golden-brown with an internal temperature of 165°F (check by inserting a probe thermometer into the thickest part of the chicken without touching bone). About 12 to 15 minutes for whole pieces or 8 to 10 minutes for tenders.

Nashville Hot Coating

While chicken is cooking, carefully ladle 1 cup of hot oil directly from the fryer into a heatproof bowl (I use a stainless steel mixing bowl or glass dish). Whisk in the Nashville hot seasoning rapidly but carefully until the brown sugar incorporates. Taste test and adjust seasonings as needed. Dip the hot fried chicken immediately into the spice mixture straight from the frying pan. Tossing several times to coat well . Place the finished pieces onto slices of white bread, top with pickles and serve immediately.


From: https://badbatchbaking.com/princes-nashville-hot-chicken-inspired-recipe/#recipe

Beer Cheese Sauce

•  2:1 Flour and Butter
• Beer
• Velveeta
• White Pepper
• Cayenne

Melted down some butter and made a roux with 2:1 flour to butter. Add beer let it cook off then add velveeta 
and seasoning. White pepper and cayenne will make it pop.

From: Anthony

Hatch Green Chile Chicken Pizza


Ingredients

3 tablespoons butter

1 jalapeno, seeded and finely diced

2 tablespoons plus 2 teaspoons flour

5-6 garlic cloves, chopped

1 cup white wine

3/4 cups heavy cream

1 1/2 cups Hatch green chiles (canned green chiles also work), seeded and diced

1 3/4 teaspoon kosher salt

1 teaspoon cumin

pizza dough

3/4 cup roasted chicken, shredded

juice of 1 lime

shredded mozzarella

chopped fresh cilantro, optional topping


Instructions

1. In a sauce pan melt the butter over medium heat. Add the jalapenos and cook until

softened, about 2 minutes.

2. Add the flour and incorporate with a whisk. Continue to whisk until the roux (the butter and

flour mixture) becomes golden brown.

3. Add the garlic and cook for 1 minute.

4. Whisk in the white wine and bring to a boil.

5. Reduce the heat to medium-low and add the cumin, cream and 1 cup of Hatch green chiles.

Let simmer for 15-20 minutes or until the sauce has thickened and reduced. Turn off the

heat and add the juice of 1/2 a lime. Stir to combine.

6. While the sauce is simmering, place the chicken into a bowl and top with 1/4 teaspoon

kosher salt and juice of half a lime. Set aside.

7. Turn the oven to 500 degrees.

8. Roll out the pizza dough onto a floured surface. Add a few spoonfuls of hatch chile sauce to

the top of the dough. Be sure to evenly spread out the sauce. Keep in mind that too much

sauce will make for soggy pizza.

9. Evenly distribute the chicken on top of the pizza.

10. Top with 1/2 cup (or more) chopped green chiles and shredded mozzarella.

11. Bake in the oven for 10-14 minutes or until the pizza is golden and the cheese melted.

12. Top with optional cilantro and serve immediately.


https://apleasantlittlekitchen.com/recipe/featured-categories/classics/hatch-green-chile-chicken-pizza/ 2/2


The sauce makes enough for 2-3 pizzas. Double the chicken to accommodate additional

pizzas if necessary. This recipe was also featured in The Dallas Morning News (click here for

full story and recipe).

Mini Cinnamon Rolls

 Ingredients

1 tube crescent rolls or crescent dough sheet

3 Tablespoons butter, melted

¼ cup packed light brown sugar

½ Tablespoon ground cinnamon

1 cup powdered sugar

2 Tablespoons milk

1 teaspoon vanilla extract


Cream cheese icing

4 oz cream cheese room temperature

1/4 cup unsalted butter room temperature

1 cup powdered sugar

1-2 tbsp whole milk (to desired thickness)

1/2 tsp vanilla extract


Instructions

Preheat oven to 350F degrees.

Line a cookie sheet with parchment paper.

Unroll your crescent dough sheet onto a floured surface or onto parchment paper.

If you are using regular crescent rolls (instead of the seamless dough sheet), you are going to want to push together all the seams so you create one sheet of dough.

Spread melted butter onto one side of the dough.

Sprinkle brown sugar evenly onto dough.

Then sprinkle with cinnamon.

Starting with the long end of the dough, begin rolling the dough up using both hands and trying to keep it as even as possible.

Then start cutting, using a sharp knife, into 1-inch rolls.

Gently place rolls onto your parchment-lined cookie sheet (about 2 inches apart from each other).

Bake for about 10-12 minutes on middle rack of your oven.

While the rolls are baking, start making the icing.

Whisk together powdered sugar, milk and vanilla extract until smooth.

Once rolls are done baking (they should be a light, golden brown color), start drizzling on the icing or you can dunk the rolls right into the bowl of icing as you eat them.

Sunday, December 4, 2022

Self Rising Flour

 1 cup all-purpose flour

1 1/2 teaspoons baking powder

1/4 teaspoon salt

Tuesday, November 22, 2022

Cherry Dump Cake

15.25 ounce box yellow cake mix

2 (21 ounce) cans cherry pie filling

1 teaspoon almond extract, divided use

½ cup salted butter (1 stick), melted


Instructions

Preheat oven to 350Fdegrees. Spray a 9"x 13" baking dish with nonstick cooking spray.

Stir ½ teaspoon almond extract into each can of pie filling and stir.

Pour both cans of cherry pie filling into prepared baking dish.

Sprinkle yellow cake mix evenly over cherry pie filling.

Slowly pour melted butter all over the top of the cake mix. Note: you could also slice the butter up into a bunch of squares and then evenly place them all over the top of the cake mix rather than melting the butter and pouring on top.

Bake for about 50-60 minutes (until topping is golden brown)


Notes

This can be done in the crock pot as well. Cook on low for 4 hours or high for 2 hours.

You can switch the cherry out for any flavor: peach, strawberry, blueberry, apple and on and on. Whatever you love!

Some folks add more tartness to this by adding pineapple. You could certainly do that but I find that I like it best as straight-up cherry with a little almond extract added. That's my little twist in this recipe. Almond flavor and cherries go together perfectly.

For added crunch, try sprinkling some sliced almonds on top of the cake mix before baking.

Instead of melting the butter you can cut it up into a bunch of squares and evenly place it on top of the cake mix layer. 

Wednesday, September 14, 2022

Sweet Spice

 2 tablespoons light brown sugar 

2 tablespoons ground cinnamon

4 teaspoons dried ground ginger

1 teaspoon ground nutmeg

½ teaspoon ground cloves

½ teaspoon ground cardamom


Chicken and Sausage Gumbo

1 cup canola oil

1 cup all purpose flour

1 med onion

1 med green bell pepper

3 stalks celery

1 1/2 quart chicken stock

1 pound boneless/skinless chicken meat

1 pound smoked pork sausage

Cayenne pepper to taste

1-2 teaspoon each Salt - Black Pepper - Garlic Powder 

Cooked rice


For Roux:

Simply heat an oven to 325F and place equal amounts of fat (I use canola oil) and flour in a cast iron skillet.  Combine well and place in the oven.  Stir about every 30 minutes.  After about 1 1/2 to 2 hours you will have the perfect deep dark roux.  

Using the oil and flour prepare a dark roux using the method described above.  While the roux is cooling slightly chop onion, bell pepper, and celery. Set aside.

Directions:
Cut the chicken into 1 inch chunks and season with a blend of the salt, black pepper, garlic powder, and cayenne pepper.  Mix well and set aside.

Slice the pork sausage into 1/2 inch slices.

In a large heavy pot over med high heat add the sausage.  Cook to render some of the fat and to brown it.

Remove with a slotted spoon and set aside.  Leave the brown bits in the bottom of the pan and to it add the onion, bell pepper, and celery.  Cook the vegetables while scraping the bottom of the pan to remove the brown bits.  Cook for about 3 minutes or until the onion just starts to become translucent.

Lower the heat to low and add the prepared dark roux along with a teaspoon of garlic powder.  Stir constantly to incorporate well with the vegetables and to avoid burning the roux. Cook only for about 1 minute.

Gradually add in the chicken stock a few cups at a time and stirring to incorporate in between.  Although my recipe calls for 1 1/2 quarts, I eyeball it while adding the stock to get the desired consistency I prefer. I usually end up with about 1 1/2 cups of stock left.

Add the sausage and the chicken to the pot.  Cook over low heat stirring occasionally. After about 10 minutes skim off any fat or scum that may rise to the surface.  Season with cayenne pepper to suit your level of 'HEAT', I generally go for about 2 teaspoons.

Continue to cook for about another 10 minutes, again stirring occasionally and removing any surface fat or scum.

To serve spoon a generous portion of the Gumbo into a large bowl and place a scoop of cooked rice in the center.

From: https://steemit.com/food/@scottrok/the-best-damn-cajun-style-gumbo-recipe-ever-the-secret-is-in-the-roux-baby

Burgundy Mushrooms


4 pounds white button mushrooms

1 liter Burgundy wine (other dry red wines will work)

2 cups boiling water

1/2 pound (2 sticks) butter

1 1/2 teaspoons Worcestershire sauce

1 teaspoon dill seed

1 teaspoon freshly ground black pepper

4 beef bouillon cubes

4 chicken bouillon cubes

4 cloves garlic, peeled

Salt

Crusty bread, for serving

Directions


WATCH Watch how to make this recipe.

Thoroughly wash the mushrooms and throw them into a large stockpot. Add the wine, boiling water, butter, Worcestershire sauce, dill seed, black pepper, beef and chicken bouillon cubes and garlic. Stir to combine. 

Bring the mixture to a boil over medium-high heat. Reduce the heat to low and simmer, covered, for 6 hours. 

Remove the lid, and then continue cooking, uncovered, for 3 hours. 

Add salt to taste at the end of the cooking process. The mushrooms will be very dark in color. Serve straight from the pot or spoon the mushrooms and cooking liquid into a serving bowl. Have crusty bread nearby to soak up the deliciousness. 

Cook’s Note

These are even more scrumptious the next day!


From: https://www.foodnetwork.com/recipes/ree-drummond/burgundy-mushrooms-recipe-2106872

Crockpot Chicken Marsala

 6 (1.5 pounds, total) boneless, skinless chicken breasts

1 teaspoon garlic powder

1 teaspoon dried basil

1 teaspoon dried thyme

1/2 teaspoon sweet paprika

salt and fresh ground pepper, to taste

1 tablespoon olive oil

8 ounces mushrooms, sliced

3 cloves garlic, minced

1 cup dry marsala wine

1/2 cup water

1/4 cup cornstarch

1/4 cup heavy cream

chopped fresh parsley, for garnish


Lightly grease a 6-quart slow cooker with cooking spray and set aside.

Season chicken breasts all around with garlic powder, dried basil, thyme, paprika, salt, and pepper.

Heat olive oil in a skillet over medium-high heat.

Add prepared chicken breasts to the hot oil and cook for 3 minutes per side, or until just browned.

Transfer chicken to slow cooker and top with mushrooms and garlic.

Return skillet over medium-high heat and add the marsala wine; cook for 1 minute, scraping up all the browned bits from the bottom of the skillet.

Pour wine over chicken and mushrooms.

Close with a lid and cook on LOW for 4 to 5 hours, or on HIGH for 2 to 3 hours. Chicken is done when internal temperature reaches 165˚F.

Remove chicken breasts from slow cooker and set aside on a plate.

Combine water and cornstarch in a mug or a small mixing bowl and whisk until incorporated; then, whisk the slurry into the wine sauce.

Add heavy cream to the wine sauce and whisk until combined.

Return chicken to the slow cooker; cover with a lid and cook on HIGH for 20 minutes, or until sauce has thickened.

Transfer chicken from slow cooker to plates; top with mushroom sauce and garnish with fresh parsley.

Serve.


NOTES:

If you don’t have time to brown the chicken breasts, you don’t have to, but it does help with the overall flavor.

Try to use DRY Marsala Wine. Sweet Marsala Wine is for desserts. If you don't want to use wine, you can use low sodium chicken broth, instead. I would also recommend chicken broth for those that are watching their calories, carbs, and/or are on a Keto diet.

If you don't have Marsala Wine, you can use Sherry, Madeira, Dry White Wine, or Port. Please keep in mind that using anything other than Dry Marsala Wine will alter the overall classic flavor.

Keep leftovers refrigerated for up to 4 days. From: https://diethood.com/slow-cooker-chicken-marsala/

Amaretti Cookies

 4 cups slivered almonds

2 cups granulated sugar

4 large egg whites

1 teaspoon pure almond extract

Confectioners' sugar, for dusting


Step 1

Line baking sheets with parchment paper.


Step 2

Grind almonds with granulated sugar in the bowl of a food processor until fine. Transfer to a medium bowl. In the bowl of an electric mixer fitted with the whisk attachment, beat egg whites until stiff peaks form. Add almond extract. Gently stir egg-white mixture into almond mixture to form a thick paste.


Step 3

Drop dough in rounded teaspoons onto prepared baking sheets about 1 1/2 inches apart. Dust with confectioners' sugar, and let stand at room temperature to dry for 2 hours.


Step 4

Place rack in center of oven, and preheat oven to 300 degrees. Transfer sheets to oven, and bake amaretti until edges are golden and cookies are firm, 20 to 25 minutes. Transfer cookies to a wire rack to cool. Dust with confectioners' sugar. Repeat with remaining cookie dough.

From: https://www.marthastewart.com/351308/bonnies-amaretti-cookies

Chicken Picatta Sauce

2 tablespoons pan drippings from searing chicken breasts or 2 tablespoons unsalted butter, plus more if needed

2 tablespoons finely minced shallots
1 cup white wine
1 1/2 cups chicken stock
2 tablespoons capers, chopped
2 tablespoons finely minced fresh parsley
2 tablespoons unsalted butter
Zest and juice of 1 lemon
Kosher salt and freshly cracked black pepper 

Heat the pan with the drippings over medium heat. Add the shallots and cook (adding a touch of butter if necessary) until soft and lightly caramelized, about 5 minutes. Add the white wine and reduce until the pan begins to sizzle again, 4 to 5 minutes. Add the chicken stock and reduce by one-half, 7 to 10 minutes. Add the capers and parsley, then whisk in the butter and lemon zest and juice. Season with salt and pepper.

Cook’s Note

This recipe is for a pan sauce using the drippings from searing chicken breasts. You can also substitute butter.

From: https://www.foodnetwork.com/recipes/geoffrey-zakarian/chicken-pan-sauce-picatta-3298376

Creamy Italian Salad Dressing


1/4 cup white wine vinegar
2 tablespoons lemon juice
1/3 cup good quality olive oil
1/2 cup natural, high-quality mayonnaise
2 cloves fresh garlic, finely minced
1/2 teaspoon dried basil
1/2 teaspoon dried oregano
1/2 teaspoon dried parsley
1/2 teaspoon dried thyme
2 teaspoons honey
1/4 cup parmesan cheese, finely grated
salt and pepper to taste
a few tablespoons of water (ONLY IF NEEDED to thin the dressing out a little bit)

Instructions
Add all ingredients to a large mason jar and shake very well until combined. Store in the fridge for a few hours before serving, or serve immediately over your favourite garden salad.
Shake well before serving.
If the dressing is too thick, simply add water one teaspoon at a time to thin it out to the desired consistency.
Notes
This salad dressing keeps in the fridge for up to 5 days, so make it a day or two ahead of serving to save time!
If you prefer to make salad dressing without mayonnaise, simply substitute the mayonnaise in this recipe for 1/4 cup of vegetable oil and shake very well (or blend for best results). From: https://thebusybaker.ca/


Chicken al Pastor on a Sheet Pan

 1 1/2 pounds boneless, skinless chicken thighs 

1/2 yellow onion, thinly sliced

al pastor marinade, below

2 cups finely diced pineapple

for serving, as desired: charred corn tortillas, cilantro lime rice, black beans, Mexican crema or cashew crema, pickled red onions, freshly chopped cilantro, queso fresco or cheese of choice, salsa of choice, lime wedges, etc.

for the al pastor marinade:


3 cloves garlic

2–3 chipotle peppers, from a can packed in adobo sauce

1/2 cup orange juice

1 tablespoon apple cider vinegar

2 tablespoons brown sugar (or honey, or agave)

1 tablespoon achiote paste (see Recipe Notes)

1 tablespoon ancho chili powder

1 teaspoon ground cumin

1 teaspoon dried oregano

1 1/2 teaspoons kosher salt

INSTRUCTIONS

Prep the al pastor marinade & marinate the chicken: Add all listed marinade ingredients to a blender. Blend until combined. Add the chicken thighs & thinly sliced yellow onion to a large bowl. Pour the al pastor marinade over top & toss to combine. Marinate in the refrigerator (covered) for at least 6 hours or up to 3 days.


Preheat the oven to 425 degrees F, arranging the oven racks such that one is in the center of the oven & one is 6-8 inches under the broil. Line a large rimmed baking sheet with foil for easy clean up, as desired, and set aside.


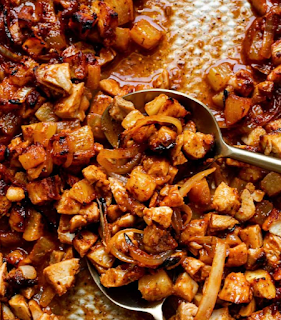
Bake the chicken: Transfer the marinated chicken & onions to the prepared baking sheet, draining & any excess marinade. Add the diced pineapple to the baking sheet. Toss to combine with the chicken & onions, spooning a little extra al pastor marinade into the mix as necessary to coat the pineapple with the sauce. Bake on the center rack for 15 minutes. The chicken should be nearly cooked through. Remove the chicken from the oven to chop, and meanwhile preheat the broiler.  al pastor-marinated chicken thighs & sliced onion on a silver quarter baking sheet with finely diced pineapple. The sheet pan sits atop a white plaster surface.

Dice the chicken al pastor: Transfer the chicken to a cutting board & carefully chop the chicken into bite-sized pieces. Place the chopped chicken pastor back on the baking sheet. Baked al pastor chicken thighs & sliced onion on a silver quarter baking sheet with finely diced pineapple. The sheet pan sits atop a white plaster surface.


Broil for crispy chicken al pastor: Place the baking sheet under the broiler. Broil 4-5 minutes, turning the pan halfway through, until the al pastor chicken are browned & slightly crisp.

Wednesday, August 10, 2022

Whiskey Garlic Cream Sauce


1/4 cup Whiskey

2 Tbsp Butter

2–3 cloves Whole Garlic, peeled

2 tsp Fresh Thyme, minced

1 Tbsp Dijon Mustard

1/2 cup Heavy Whipping Cream (You can use Half and Half also, but it will not be as thick of sauce)

1/4–1/2 cup Beef Broth, to thin if desired

Ground Black Pepper


Place the pan back on the stove and turn the heat to medium low or medium. With the drippings from the steak in the pan, whisk in the butter and allow it to melt into the drippings. Add the garlic and thyme to the pan and allow them to become fragrant, about 1-2 minutes. Stir in the whiskey and continue to whisk, scrapping any bits off the bottom of the pan. Stir in the dijon mustard, cream, and beef broth to thin the sauce if desired. Allow the mixture to simmer and thicken. Season with ground pepper if desired.


From: https://homemadehome.com/cast-iron-bavette-steak-with-whiskey-garlic-cream-sauce/#tasty-recipes-24582

Wednesday, June 15, 2022

Cheese Enchiladas with Red Sauce

14-16 white corn tortillas

16oz shredded Mexican cheese blend

For the Red Enchilada Sauce:

3 Tablespoons vegetable oil

2 Tablespoons All-purpose flour

3 Tablespoons chili powder

1/2 teaspoon onion powder

1/2 teaspoon dried oregano

scant 1/2 teaspoon salt

1/4 teaspoon garlic powder

1/4 teaspoon cumin

1/4 cup tomato paste

2 cups chicken broth


Preheat oven to 350 degrees then spray a 9x13" baking dish, or two smaller casserole dishes, with nonstick spray and set aside.

For the Red Enchilada Sauce: Heat oil in a saucepan over medium heat then add flour and whisk constantly for 1 minute. Add seasonings - chili powder through cumin - then whisk until the spices are toasted and very fragrant, 1-2 minutes. Add tomato paste then whisk until combined, and then slowly stream in chicken broth while whisking to create a smooth sauce. Turn heat up to medium-high then simmer until sauce has thickened, 3-4 minutes, stirring often. Cool slightly - can be made up to several days ahead of time. Warm before using.

Assembly: Spread 1/2 cup enchilada sauce into the bottom of the baking dish then reserve 1 cup shredded cheese and set aside. Place 1 tortilla on a plate or cutting board then add 1/4 cup shredded cheese into the center and roll snugly. Place seam-side down into the baking dish then continue until the dish has been filled.

Spoon enchilada sauce over the tops of the tortillas ensuring they are completely covered - uncovered spots will come out tough and hard - then sprinkle reserved cheese on top.

Cover baking dish with nonstick sprayed foil then bake for 20-30 minutes, or until the cheese has melted and sauce is hot and bubbly. Let enchiladas rest for 5 minutes then serve.


Pickled Onions

 1 medium red onion, very thinly sliced

½ cup water

¼ cup distilled white vinegar

¼ cup apple cider vinegar or additional white vinegar

1 ½ tablespoons maple syrup or honey

1 ½ teaspoons fine sea salt

¼ teaspoon red pepper flakes (optional, for heat)


INSTRUCTIONS

Pack the onions into a 1-pint mason jar or similar heat-safe vessel. Place the jar in the sink, to catch any splashes of hot vinegar later.

In a small saucepan, combine the water, both vinegars, maple syrup, salt, and pepper flakes. Bring the mixture to a gentle simmer over medium heat, then carefully pour the mixture into the jar over the onions.

Use a butter knife or spoon to press the onions down into the vinegar and pop any air bubbles in the jar. Let the pickled onions cool to room temperature (about 20 to 30 minutes), at which point they should be sufficiently pickled for serving.

Cover and refrigerate leftover pickled onions for later. Quick-pickled onions are best consumed within three days, but they keep for 2 to 3 weeks in the refrigerator.

Friday, June 3, 2022

Pretzel Crust

2½ cups pretzels crushed

13 tablespoons butter

¼ cup brown sugar packed


Instructions

Preheat oven to 350 degrees and grease pie dish.

Crush pretzels until fine in a food processor or by hand using a sealed bag and a mallet.

In a medium mixing bowl, melt butter.

Fold pretzels and brown sugar into the melted butter.

Transfer to pie dish. Press using a measuring cup or drinking glass pushing the base of the crust to create a slight wall.

Bake 10 minutes. Cool before filling.

Notes

Substitutions

Pretzels - Make it gluten-free using gluten-free pretzels.

Butter - Unsalted butter is preferred when using salted pretzels, but you can use salted butter if needed.

Brown Sugar - You can substitute white sugar if in a pinch.

No Bake 

Freeze for 30 minutes. Fill per recipe.

Tips

Avoid gaps. Fill in with as needed.

If you have more than 1 of the same pie plate, you can gently press one on top of the other for a picture perfect compact crust without effort!

To Store

Refrigerate - This pretzel pie crust can be stored baked or unbaked in the fridge for up to 5 days.

Freeze - Wrap the cooled crust in foil and place in a freezer bag. It will keep well for up to two months.

Pie Crust

 All Butter Crust

  • 2 1/2 cups all purpose flour,  plus extra for rolling


    1 cup (
    8 ounces) unsalted butter, very cold, cut into 1/2 inch cubes
    1 teaspoon salt
    1 teaspoon sugar
    6 to 8 tablespoons ice water

Combination Butter and Shortening Crust

  • 2 1/2 cups all purpose flour


    1
     teaspoon salt
    2 tablespoons sugar
    3/4 cup (12 tablespoons) unsalted butter, chilled, cut into 1/4 inch cubes
    1/2 cup vegetable shortening
    8 tablespoons ice water

Egg Wash

  • tablespoon heavy cream, half and half, or milk


    large egg yolk
  1. Directions

    Mix the flour, sugar, and salt:

    Put flour, sugar, and salt into the bowl of a food processor and pulse a couple times to mix. Add the butter, half at a time, pulsing several times after each addition:

    Add about half of the butter to the food processor and pulse several times. Then add the rest of the butter and pulse 6 to 8 times until the largest pieces of butter are about the size of large peas.
    Food processor with cubed butter and flour to make a pie crust recipe butter.

  2. Butter and flour combined in a food processor to show how to make pie crust.
  3. Slowly add the ice water:

    Sprinkle the mixture with 4 tablespoons of the ice water (make sure there are no ice cubes in the water!) and pulse again. Then add more ice water, a tablespoon at a time, pulsing once or twice after each addition until the dough just barely begins to hold together. You may not need all the water.

    The mixture is ready when a small handful of the crumbly dough holds together when you pinch it with your fingers.

    Homemade pie crust made in a food processor.

  4. Make two dough discs:

    Carefully empty the crumbly dough mixture from the food processor on to a clean, dry, flat surface. Gather the mixture in a mound.

    Divide the dough mixture into two even-sized mounds. Use your hands and knead each mound just enough to form each one into a disc. Do not over-knead! Kneading develops gluten which will toughen the dough, not something you want in a pastry crust. You should just knead enough so that the dough holds together without cracks.

    If you started with cold butter you should be able to see small chunks of butter speckling the dough. This is a good thing. These small bits of butter will spread out into layers as the crust cooks so you have a flaky crust!

    Sprinkle each disc with a little flour, wrap each one in plastic wrap, and refrigerate for one hour or up to 2 days.

    Two piles of crumbly pie dough.

  5. Remove dough from refrigerator and let sit for a few minutes:

    Remove one crust disc from the refrigerator. Let sit at room temperature for 5-10 minutes in order to soften just enough to make rolling out a bit easier.

  6. Roll out dough, place in pie dish:

    Roll out with a rolling pin on a lightly floured surface to a 12-inch circle; about 1/8 of an inch thick. As you roll out the dough, check if the dough is sticking to the surface below. If necessary, add a few sprinkles of flour under the dough to keep the dough from sticking.

    Carefully place onto a 9-inch pie plate. Gently press the pie dough down so that it lines the bottom and sides of the pie plate.

    Use a pair of kitchen scissors to trim the dough to within 1/2 inch of the edge of the pie dish.

    Rolling out an easy pie crust.
    Using a rolling pin to place an easy pie crust in a glass pie plate.
    The bottom crust set in the pie pan.
  7. Add filling to the pie
    Apple pie filling the pie crust.
  8. Roll out second disc, place on top of filling:

    Roll out second disc of dough, as before. Gently place onto the top of the filling in the pie.

    Trim excess dough with kitchen shears, leaving a 3/4 inch overhang. Fold the edge of the top piece of dough over and under the edge of the bottom piece of dough, pressing together.

    Flute edges using thumb and forefinger or press with a fork.

    Score the top of the pie with four 2-inch long cuts, so that steam from the cooking pie can escape.

    Adding the top crust to show how to make pie crust.
    Top edges folded over for an easy pie crust.
    Crimping the edge of a pie crust.
    Cutting slits in a homemade pie crust.

How to Pre-Bake a Pie Crust

If your recipe calls for a pre-baked crust, as many custard pie recipes do, follow all the steps above for a single, bottom crust only, without filling.

  1. Freeze the crust it for at least a half hour:

    until chilled. This is an important step in pre-baking. Otherwise the crust will slip down the sides.

    Preheat your oven to 350°F.

  2. Line pie crust with aluminum foil:

    When the pie crust is sufficiently chilled, line the pie crust with aluminum foil. Let the foil extend over by a few inches on two sides to make it easier to lift to remove the pie weights when the baking is done.

  3. Fill with pie weights:

    Fill the crust to the top with pie weights - dry beans, rice, or sugar. (Sugar works best.)

  4. Bake:

    Bake at 350°F for 45-50 minutes if making a crust for a pie that will require further cooking, for example a quiche. Bake for 60 to 75 minutes if making a crust for a pie that you don't need to bake further.

  5. Cool completely before filling:

    You may need to tent the edges of the pie with aluminum foil when you bake your pie, to keep the edges from getting too dried out and burnt.

    See more detailed instructions and photos for how to blind bake a crust here.

Combination Butter and Shortening Crust

  1. Make the dough:

    Combine flour, salt, and sugar in a food processor; pulse to mix. Add the butter and pulse 4 times.

    Add shortening in tablespoon sized chunks, and pulse 4 more times. The mixture should resemble coarse cornmeal, with butter bits no bigger than peas.

    Sprinkle 6 tablespoons of ice water over flour mixture. Pulse a couple times. If you pinch some of the crumbly dough and it holds together, it's ready.

    If the dough doesn't hold together, keep adding water, a teaspoon at a time, pulsing once after each addition, until the mixture just begins to clump together.

  2. Form discs:

    Remove dough from machine and place in a mound on a clean surface.

    Divide the dough into 2 balls and flatten each into 4 inch wide disks.

    Do not over-knead the dough!

    Dust the discs lightly with flour, wrap each in plastic, and refrigerate for at least an hour, or up to 2 days before rolling out.

  3. Roll out the dough:

    After the dough has chilled in the refrigerator for an hour, you can take it out to roll. If it is too stiff, you may need to let it sit for 5-10 minutes at room temperature before rolling.

    Sprinkle a little flour on a flat, clean work surface and on top of the disc of dough you intend to roll out. (We use a Tupperware pastry sheet that has the pie circles already marked.)

    Using a rolling pin, apply light pressure while rolling outwards from the center of the dough.

    Every once in a while you may need to gently lift under the dough (a pastry scraper works great for this) to make sure it is not sticking.

    You have a big enough piece of dough when you place the pie tin or pie dish upside down on the dough and the dough extends by at least 2 inches all around.

  4. Place into pie dish:

    When the dough has reached the right size, gently fold it in half. Lift up the dough and place it so that the folded edge is along the center line of the pie dish. Gently unfold. Do not stretch the dough.

  5. If single crust pie: trim edges:

    If you are only making a single crust pie, use a pair of kitchen scissors to trim the dough to within 1/2 inch of the lip of the dish. Tuck the overhang underneath itself along the edge of the pie dish. Use your fingers in a pinching motion, or the tines of a fork to crimp the edge of the pie crust.

  6. If making double crust pie: roll the second crust:

    If you are making a double crust pie, roll out the second disc of dough. Gently place onto the top of the filling in the pie. Use a kitchen scissors to trim the overhang to an inch over. Fold the edge of the top piece of dough over and under the edge of the bottom piece of dough, pressing together. Finish the double crust by pressing against the edges of the pie with your finger tips or with a fork.

  7. Make vents in the top:

    Use a sharp knife to cut vents into the top of the pie crust, so the steam has a place to escape while the pie is cooking.

    Before scoring, you may want to paint the top of your crust with an egg wash (this will make a nice finish).

Egg Wash

A lovely coating for a pie can be achieved with a simple egg wash.

  1. Beat egg yolk with cream and brush on the surface of the pie with a pastry brush.


    From: 
    https://www.simplyrecipes.com/recipes/perfect_pie_crust/